Panera Bread’s Autumn Squash Soup

There's something absolutely magical about walking into Panera on a crisp fall day and catching that first whiff of their legendary Autumn Squash Soup. That creamy, dreamy bowl of butternut squash perfection has been warming hearts and souls for years: and honestly, it's probably converted more people to squash lovers than any other dish on the planet!
But here's the thing: you don't need to trek to Panera every time you're craving this cozy comfort food. With just a handful of simple ingredients and about 45 minutes in your kitchen, you can whip up a batch that tastes just like the real deal: if not better! Plus, making it at home means you're looking at spending around $8 for a whole pot versus $6-8 for just one bowl at the restaurant. Talk about a win-win!
This homemade version captures everything we love about Panera's original: that silky-smooth texture, the perfect balance of natural sweetness from butternut squash and apple, and those warm spices that make your kitchen smell like autumn heaven. Whether you're planning a cozy dinner party, meal prepping for the week, or just treating yourself to some serious comfort food, this recipe is about to become your new best friend.
Why This Soup Hits Different
What makes Panera's Autumn Squash Soup so irresistible isn't just the butternut squash: it's the genius combination of ingredients that create layers of flavor. The secret lies in the apple juice that adds natural sweetness, a touch of curry powder that brings unexpected warmth, and that perfect creamy finish that coats your spoon just right.
The best part? This recipe is totally adaptable to your dietary needs. Want to keep it vegan? Easy swap with coconut milk and plant-based butter. Need it dairy-free? We've got you covered. Prefer it a little sweeter or more savory? You're the chef here: make it exactly how you like it!
What You'll Need
For the Soup Base:
- 1 tablespoon olive oil or coconut oil
- 3/4 to 1 cup yellow onion, chopped
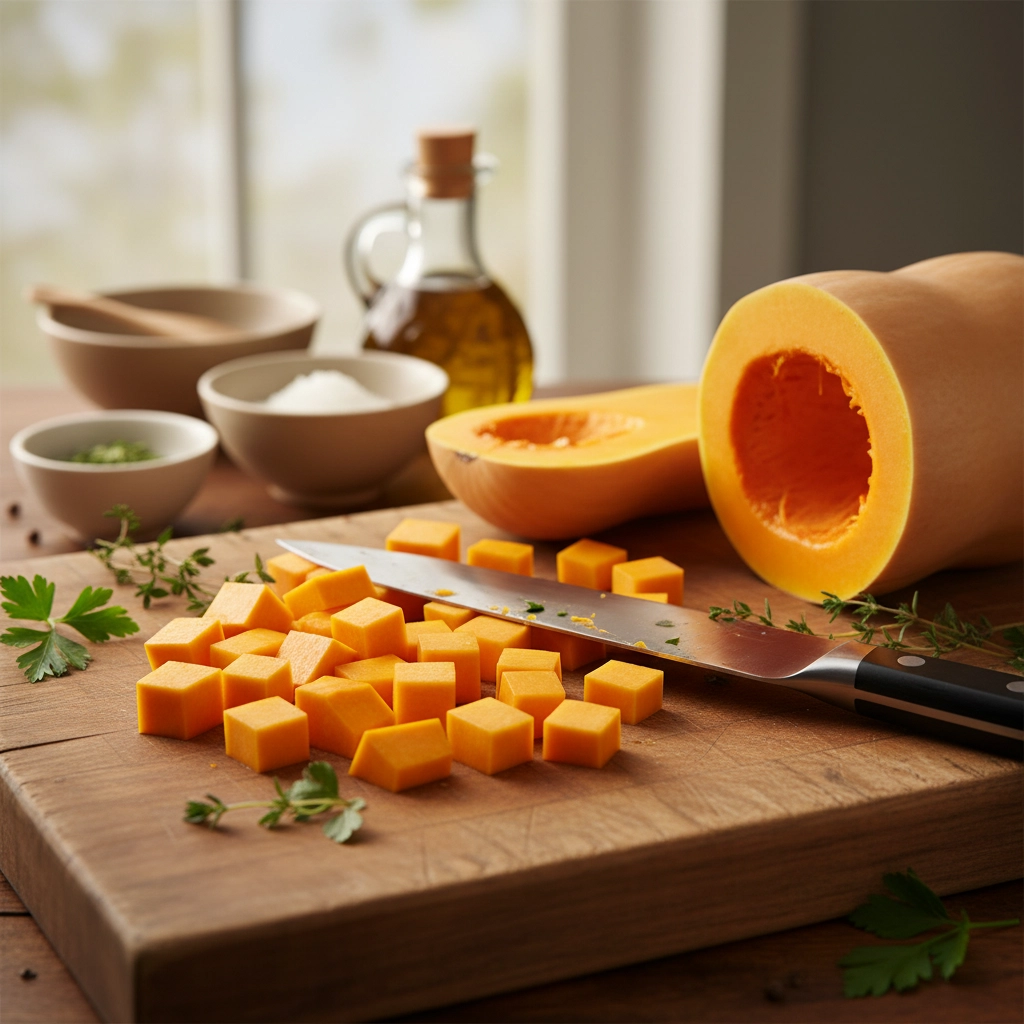
- 6 cups butternut squash, chopped into 1-2 inch cubes (about 2 pounds)
- 2 to 3 carrots, chopped
- 3.5 to 4 cups vegetable broth
- 1/2 to 1 cup apple juice or apple cider
- 1/2 cup pumpkin puree
For That Signature Flavor:
- 2 tablespoons butter (or vegan butter)
- 1 tablespoon brown sugar or maple syrup
- 1/2 teaspoon curry powder
- 1/4 teaspoon ground cinnamon
- 1/8 teaspoon nutmeg
- 1 teaspoon garlic powder
- 1 teaspoon kosher salt
- 1/2 teaspoon black pepper
For the Creamy Finish:
- 1/4 cup heavy cream or full-fat coconut milk
- 2 ounces cream cheese (optional, but so worth it!)
For Garnishing:
- Roasted pumpkin seeds
- Fresh cracked black pepper
- Chopped chives or green onions
Let's Make Some Magic Happen
Step 1: Get Your Aromatics Going
Heat that oil in a large soup pot or Dutch oven over medium-high heat. Toss in your chopped onions and let them sauté until they're soft and starting to smell amazing: about 3-5 minutes. This is where the flavor foundation starts building, so don't rush it!
Step 2: Add the Good Stuff
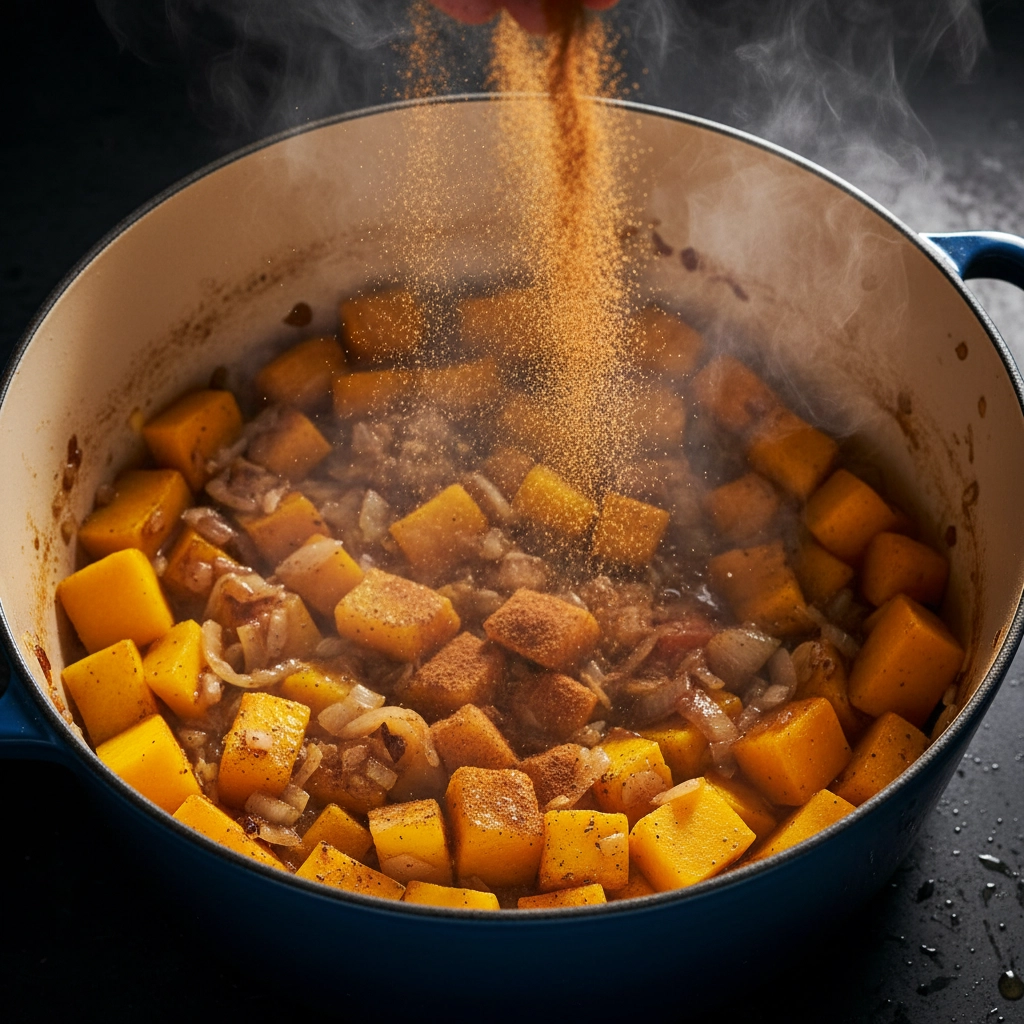
Here's where things get exciting! Add your chopped butternut squash and carrots to the pot. Sprinkle in the curry powder, cinnamon, nutmeg, garlic powder, and salt. Give everything a good stir and let it cook for 1-2 minutes until you can smell all those warm spices dancing together. Your kitchen is about to smell like the coziest fall day ever.
Step 3: Let It All Simmer
Pour in your vegetable broth and apple juice: this is what gives the soup that signature sweet-savory balance that makes Panera's version so addictive. Bring everything to a boil, then reduce the heat and let it simmer for 10-15 minutes, or until your squash and carrots are fork-tender and practically falling apart. You want them super soft for the smoothest possible soup.
Step 4: The Creamy Transformation
Remove the pot from heat and stir in the pumpkin puree, butter, brown sugar, and cream cheese if you're using it. The cream cheese is totally optional, but it adds this incredible richness that takes the soup from good to absolutely crave-worthy. Stir everything until the cream cheese is completely melted and incorporated.
Step 5: Blend It to Perfection
This is where the magic really happens! Using an immersion blender (seriously, best kitchen investment ever), blend the soup right in the pot until it's completely smooth and creamy. No immersion blender? No problem: just carefully transfer the soup in batches to a regular blender, blend until smooth, and pour it back into the pot. Either way, you're aiming for that restaurant-quality silky texture.

Step 6: The Final Touch
Stir in your heavy cream or coconut milk for that final creamy finish. Now comes the fun part: taste testing! Add more salt, pepper, brown sugar, or honey until it tastes exactly how you want it. Remember, everyone's taste buds are different, so make it yours.
Step 7: Serve and Enjoy
Warm the soup back up if needed, then ladle it into your favorite bowls. Top with some roasted pumpkin seeds for crunch, a crack of fresh black pepper, and maybe some chopped chives for a pop of color. Take a picture because this is definitely Instagram-worthy!
Pro Tips for Soup Success
Make It Your Own: The beauty of homemade is customization! Want it sweeter? Add an extra drizzle of maple syrup. Prefer it more savory? Bump up the curry powder slightly. Love a little heat? A tiny pinch of cayenne pepper works wonders.
Dairy-Free Magic: Swap the butter for coconut oil, use plant-based cream cheese, and go with full-fat coconut milk instead of heavy cream. The result is just as creamy and delicious: promise!
Texture Matters: If your soup ends up too thick, just thin it with a splash of vegetable broth. Too thin? Let it simmer uncovered for a few extra minutes to concentrate those flavors.
Prep Like a Pro: This soup is meal prep gold! It freezes beautifully for up to 3 months, so you can batch cook and have cozy comfort food ready whenever you need it.

Storage and Reheating
Store any leftover soup in the refrigerator for up to 5 days in airtight containers. When reheating, you might need to add a splash of broth or water since the soup tends to thicken up in the fridge: totally normal! Just warm it gently on the stove, stirring occasionally.
For freezing, let the soup cool completely before portioning into freezer-safe containers. When you're ready to enjoy it again, thaw overnight in the refrigerator and reheat on the stovetop. You might want to give it another quick blend if the texture seems off after freezing.
Perfect Pairings
This soup is absolutely delicious on its own, but if you want to make it a complete meal, try pairing it with some crusty bread for dipping, a simple green salad, or even a grilled cheese sandwich for the ultimate comfort food experience. The creamy, slightly sweet soup also pairs beautifully with savory dishes like roasted chicken or a hearty grain bowl.
This recipe serves about 4-6 people generously, making it perfect for family dinners or having friends over. At roughly $1.50 per serving compared to Panera's $6-8 price tag, you're saving serious money while enjoying the exact same cozy, comforting flavors right in your own kitchen.
This recipe is inspired by Panera Bread and is not affiliated with or endorsed by them.